Topping Up the Christmas Tree With Pokestops
You ever have one of those days where you get an idea, it looks simple, but once you knock out the obvious parts it starts getting ugly?
Yes, this project is like that.
From the top. This is what it looks like (by intention):
 Fairly simple, right? It's a simple Pokemon Go Pokestop, that weird location where you put out a finger, give it a spin, and it showers you in presents by shooting balls and sticky potions in your face. Perfectly sensible as an inspiration.
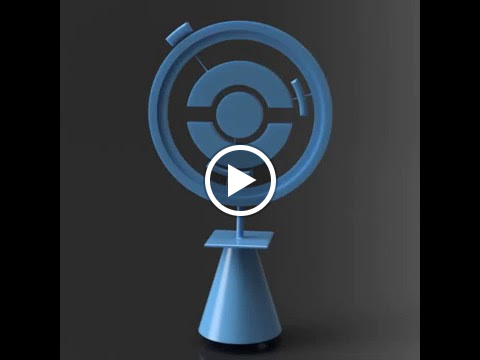
 This is what burped its way out of my brain:
A perfectly sensible translation, at least if you intend to stick it on a tree. There are a couple subtleties that can be pretty easily overlooked if you're in a hurry, like the fact the outer ring has a definite inner lip, or the fact that there are multiple floating parts that we don't currently have maglev or anti-grav to keep in the air without some kind of through-post to suspend them -- which needs to at least be notionally strong enough to keep the bits suspended. It's even more complicated if you envision this sort of thing topping one of the larger trees and standing a solid 13in or so.
So, let's take a look at these supports.
 Frankly, the scale of the thing helps us a tiny bit here. Pushing through 1.5mm bars at roughly 30 degree offsets lets us distribute the mass of the center section with a reasonable degree of security. Both ABS and PLA are pretty tough when it comes to non-layer shear, and the sintering printers used by Shapeways get even better layer adhesion. I feel pretty sure this isn't going anywhere any time soon.
But soft, what is this! A terrible limitation!
Yes, this project is like that.
From the top. This is what it looks like (by intention):

 This is what burped its way out of my brain:
A perfectly sensible translation, at least if you intend to stick it on a tree. There are a couple subtleties that can be pretty easily overlooked if you're in a hurry, like the fact the outer ring has a definite inner lip, or the fact that there are multiple floating parts that we don't currently have maglev or anti-grav to keep in the air without some kind of through-post to suspend them -- which needs to at least be notionally strong enough to keep the bits suspended. It's even more complicated if you envision this sort of thing topping one of the larger trees and standing a solid 13in or so.
So, let's take a look at these supports.
But soft, what is this! A terrible limitation!
Strong & Flexible Plastic 3D Printing Material Information - Shapeways
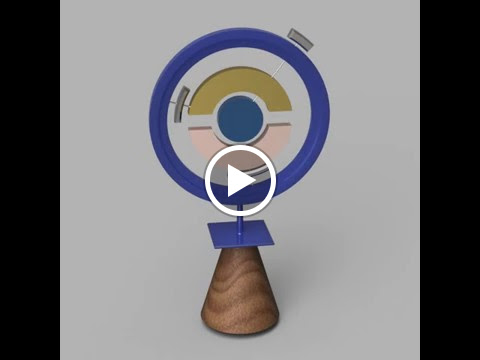
Strong and Flexible dyed materials have an inherent dimensional limitation of roughly 200mm if you want anything polished. This is a problem for what's effectively a 330mm construct with no simple and obvious through-line. You have to break it down into multiple parts for assembly by the consumer.
Well, if that's what has to be done, let's do that. Why not just start the naive way, with sections broken into nice, neat structures based on the original extrudes? There are a lot of pieces here; surely they can be reassembled by a user, right?

This would technically, work. But that is a lot of parts and a number of them are only attached at one end of a thin rod. While suspension bridges are damned impressive, personally I don't think I should be allowed to be building them.
Do you see the other obvious issue? Let's take a spin around the model and look a little harder.
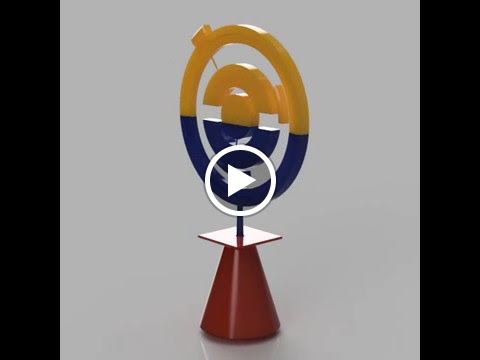
Really, the only significant space savings has been in separating the cone that goes on the tree proper from the rest of the piece. It still has a rather huge, undivided ring which is remarkably long and is pretty much guaranteed to give us trouble in printing volume.
Let's reconsider the options. What we really want to do is cut the height; the width is just about fine. Cutting the cone off can be done pretty neatly. There has to be at least one more plane that can cut across this thing -- ah ha!
I know what you're thinking: "Why did you cut straight across the middle circular body there? You could have just clipped the support and gone around!"
Yes, but think on this. One of the basic original problems was that I really wanted to avoid, the cutting of the supports at either end, leaving it just pressing against a surface. By cutting across the center circle, I avoid that and leave myself volume enough to put in a registration pin.
"What?"
A registration pin. It looks a little something like this:

Essentially, there are some extended pins that fit from section to section, 2mm deep with a 3 degree draft which makes the sides sloped just a bit so they'll seat more easily. With three pins across the middle, it should have enough surface to glue comfortably without being too hard to seat.
There's another pin down at the cone's connection to the underside of the pillar which follows suit.
Three parts of those dimensions means that no single part is too large to fit in a printer and the per-piece manufactury costs are kept to a minimum. All of which is absolutely awesome.


If you've liked what you've seen and want to throw a few dollars at my head to buy my love, or just to have your own Pokemon Go Pokestop Tree Topper, you can pick it up on Shapeways easily enough.
If that's just too darn big for your tree (or too rich for your blood), there is a scaled-down 8in version which might suit you just a little bit better.
If this is the sort of thing you like, or you'd just like more of it, let me know!

Comments